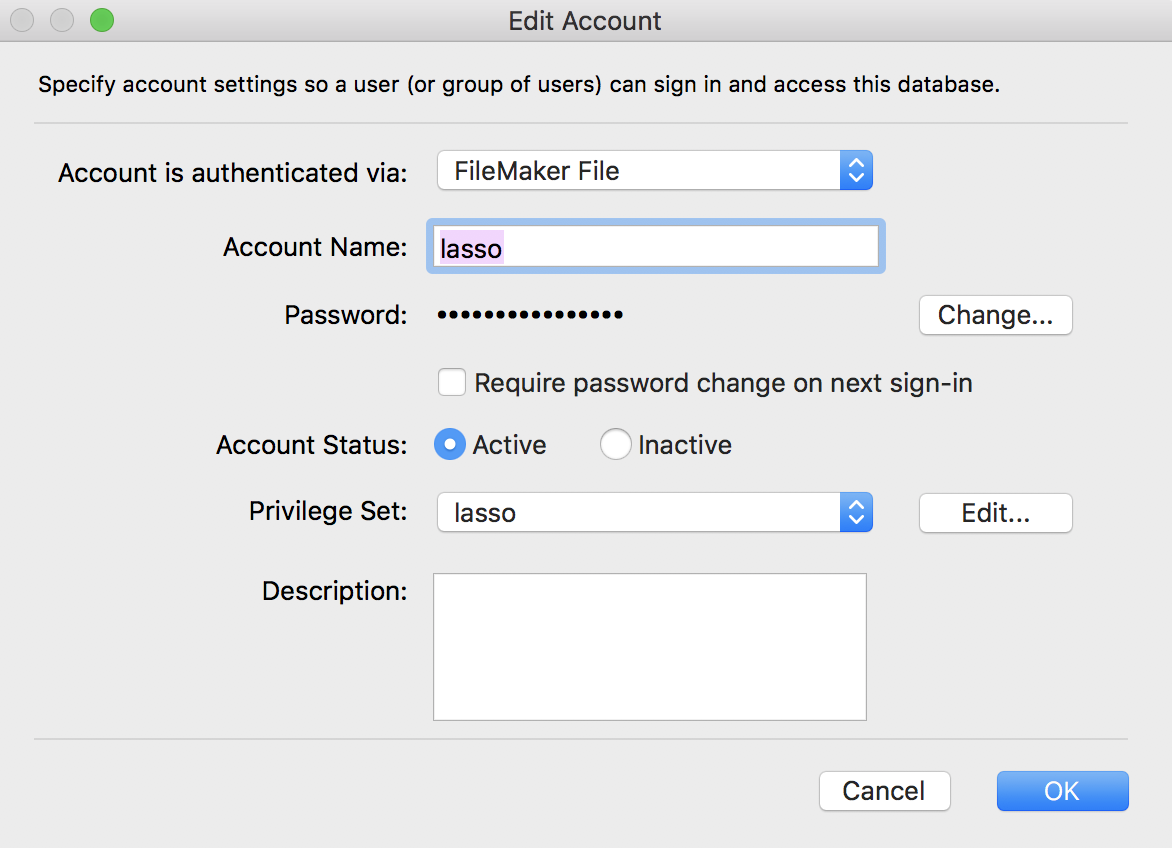
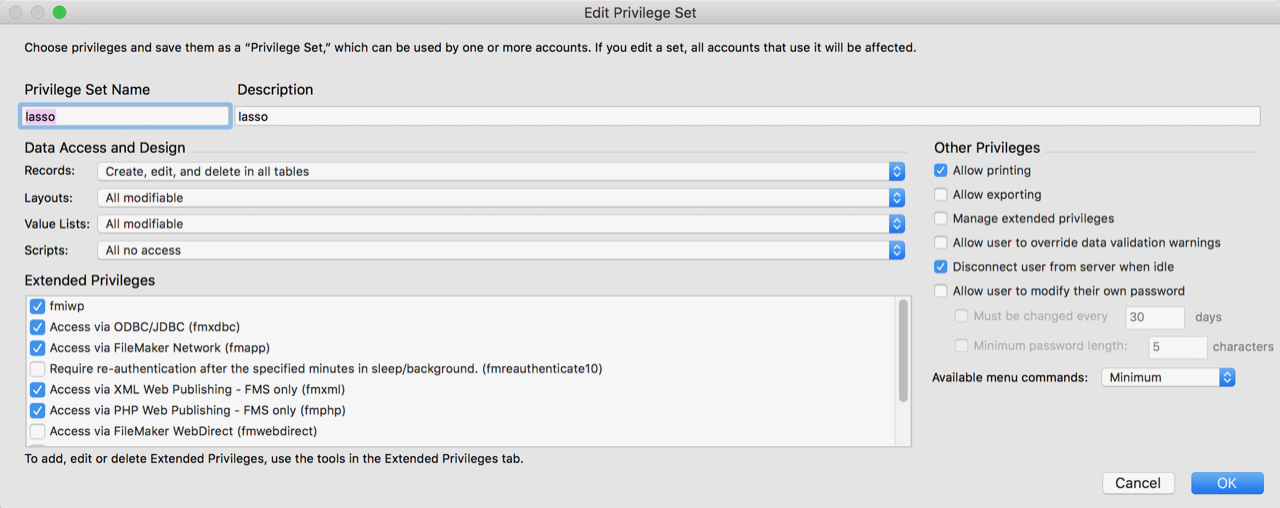
I was recently asked to connect Lasso to recent versions of FileMaker Server. Due to the recent removal of configurations from the UI in FMS 17+, it became necessary to utilize the FMS command line utility to enable features allowing Lasso to communicate with the FMS Web Publishing Engine (WPE). In FMS 18+ the JAVA JRE is no longer included in the FMS distro and requires additional efforts to enable the WPE as well. By following the steps below, you can configure even the latest FMS18 to work with Lasso 8.6+.
If the database has an admin user, you will need to make these changes as an admin.


That’s it. You’re all set!
Read moreA good friend Johan Sölve was having some difficulty getting the two versions of Lasso to play together when working with images. It was published a few months back that on CentOS 6.7 that, they changed the default builds of ImageMagick from 6.5 to 6.7 and all binaries built against the older IM libs needed to be rebuilt against the newer. LP8.6 uses the 6.6 libs. Therein comes the question. How do you do that considering L9 uses IM6.7 and LP8.6 uses 6.6? It turns out it’s not too bad. I took all of the sweat out of it. From a high level perspective, you build the older IM in /usr/local and tell the OS to look there for the older binaries/libs. L9.3.x will continue looking at the default in /usr and then LP8.6.x picks up the new location upon restart and viola! Both work side by side using two different versions of IM.
Since the default location is in /usr, you can do yum update all day long and it won’t hurt the custom build you do in /usr/local.
From here out, this assumes you already have installed and initialized LP8.6 and L9.3.
I did this all as root but others may suggest differently. This works just fine as long as you are comfortable working as root. Let the fun begin!
# yum groupinstall "Development Tools"
# yum install bzip2-devel freetype-devel libjpeg-devel libpng-devel libtiff-devel giflib-devel zlib-devel perl-devel ghostscript ghostscript-devel djvulibre-devel libwmf-devel jasper-devel libtool-ltdl-devel libX11-devel libXext-devel libXt-devel lcms-devel libxml2-devel librsvg2-devel
# mkdir -p /usr/local/src
# cd /usr/local/src
# wget https://sourceforge.net/projects/imagemagick/files/old-sources/6.x/6.6/ImageMagick-6.6.5-10.tar.gz
# tar xzf ImageMagick-6.6.5-10.tar.gz
# cd ImageMagick-6.6.5-10
# ./configure --prefix=/usr/local --enable-shared=yes --enable-static=yes
# make install
# nano /etc/ld.so.conf
At the bottom add the line, if not already there, for /usr/local/lib and save the file (ctrl -o and ctrl-x).
# ldconfig
# lasso8ctl restart
This should work as-is. If you see any compilation errors, you may want to make clean; make install again. You can try other versions of 6.6 but this one worked fine. I believe it contains the first iteration of the libMagickCore.so.4 and libMagickWand.so.4 which LP8.6.x requires. You may also want to use the ~lasso/Tools/consoleLassoService.sh to restart Lasso in console mode so you can make sure the ImageTag.so library was loaded. If so, you’re golden.
Now, for Apache, I keep it simple. Since there are two different versions of Lasso connectors, you need to implicitly tell Apache which one to use for each site.
In /etc/httpd/conf.d I create a file named "all_lasso.conf" which contains:
# Include the config for the site you want into each vhost declaration from the /etc/httpd/other
# directory to load the set handlers
<IfModule !lasso8_module>
        LoadModule lasso8_module modules/Lasso8ConnectorforApache2.2.so
</IfModule>
<IfModule !lasso9_module>
        LoadModule lasso9_module modules/mod_lasso9.so
</IfModule>
In /etc/httpd/conf.d delete the lasso8.conf and mod_lasso9.conf files. Create the folder in /etc/httpd/other. In this location you will create the following:
file: "lasso8.conf"
<Location ~ "^.*\.[Ll][Aa][Ss][Ss][Oo]$">
SetHandler lasso8-handler
</Location>
<Location ~ "^.*\.[Ll][Aa][Ss][Ss][Oo][Aa][Pp][Pp]$">
SetHandler lasso8-handler
</Location>
file: "mod_lasso9.conf"
<Location /lasso9>
SetHandler lasso9-handler
Order allow,deny
Allow from all
</Location>
# instance management requests are redirected to lassospitfire
<Location /lasso9/lux>
SetHandler lasso9-instancemanager
Order allow,deny
Allow from all
</Location>
Redirect 303 /lasso9/instancemanager /lasso9/lux
# requests ending with .lasso or .lasso9 are processed by lassoserver
<LocationMatch \.(?i:lasso9?)$>
SetHandler lasso9-handler
</LocationMatch>
This loads all the lasso modules when Apache starts and then uses the correct module for each site as it is implicitly selected. In each <VirtualHost ...></VirtualHost> you will use either:
Include /etc/httpd/other/lasso8.conf OR Include /etc/httpd/other/mod_lasso9.conf
Again, this tells Apache which Lasso connector to use for each site. Within these files you can globally set the file handlers such as .html if you want or you can set it within each vhost to be processed by Lasso.
While there currently is no fix for the apache process running up to 100% CPU when used with Lasso 8.5.6 on CentOS 5.5 32bit or 64bit and taking down the server, I have found a way to reduce the occurrence greatly. Under heavy load, the server may still ramp up, but, the apache process will still continue to respond and will release load as the load decreases. I custom compiled Apache 2.0.63 and the Lasso Connector for Apache2 for CentOS 5.5 64bit ONLY and packaged it up into a tar ball for easy installation. I have posted the tar ball here or follow the directions below. This assumes you already have Lasso 8.5.6 installed on CentOS 5.5. If you need help with that, I have a script for it too. You will either need to sudo most all of this or run as root.
# cd /usr/local/

# wget http://execuchoice.net/files/apache2.tgz

# tar xzfp apache2.tgz

# rm apache2.tgz
Now there are only a few changes needed to make the system use this custom build rather than the default install.
# mv /usr/sbin/apachectl /usr/sbin/apachectl.bak

# ln -s /usr/local/apache2/bin/apachectl /usr/sbin/apachectl

# cp -p /etc/init.d/httpd /etc/httpd.bak
Use your editor of choice –
# nano /etc/init.d/httpd

OR

# vi /etc/init.d/httpd
Look for this line:
httpd=${HTTPD-/usr/sbin/httpd}
Change to:
httpd=${HTTPD-/usr/local/apache2/bin/httpd}
and this:
CONFFILE=/etc/httpd/conf/httpd.conf
to:
CONFFILE=/usr/local/apache2/conf/httpd.conf
These changes will make the init (startup) script start apache2 from our custom build and use the appropriate config file. Once this is all done, you should just use the following to start up apache2 from our custom build.
# sudo apachectl start
To check and ensure that you are using the correct version you can simply execute the following to verify:
# ps w -C httpd
You should see something to the effect of
8889 ? S 0:00 /usr/local/apache2/bin/httpd -k start
There you have it.
Special thanks to Brian Loomis who contracted me to do this and gracefully permitted me to provide this to the public free of charge.
Be sure to let me know how it works for you. Hopefully we won’t have to rely on this for too much longer since Lasso 8.6 is now in beta testing.
Read more